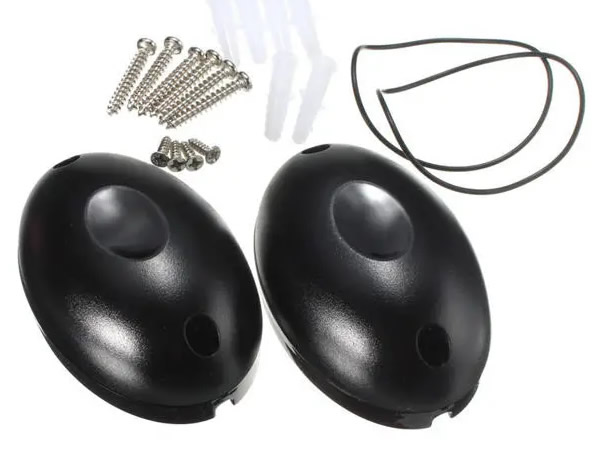
I recently have been adding a few more features to my smart home seeing that I have some extra free time at home while my state is in lockdown. One thing I have always wanted was an IR beam break detector like you see in secure commercial yards. Traditionally these have been used via an alarm system and have been outrageously expensive. While browsing BangGood’s website one day I came across a set of IR beam break sensors on sale for around $10, so I knew I had to have them.
My application for these sensors is to only trigger a Z-Wave light when a walk up the drive at night, so I was not too concerned if they were not too secure or unreliable considering the price I paid for them. To my surprise after a month of use I have had not one false trigger, and they have worked like clockwork every time I walk past them.
Essentially these devices connect up just like a PIR motion sensor and have a selectable normally open or normally closed output on them. Power wise these sensors can take a wide range of voltages from 12v to 24v DC or AC but I ended up using a pair of well regulated 18v DC power supplies that I had lying around in my junk.
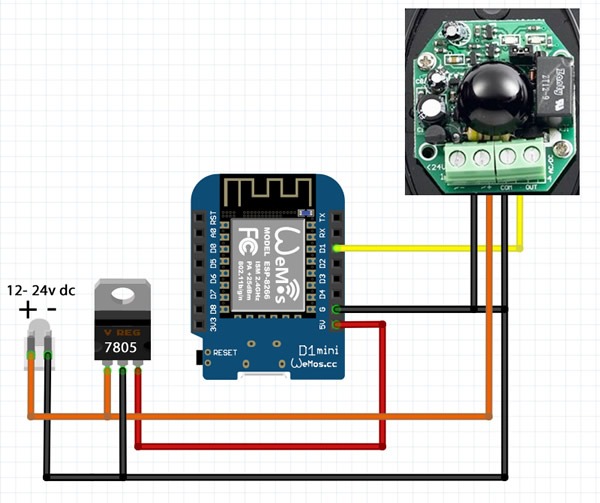
To connect these up to Home Assistant I wired them up with a Wemos D1 Mini ESP8266 chip flashed with Tasmota like I have used on several of my other projects. As one of the power supplies and Wemos D1 Mini were to live under the house I decided to power the D1 mini via the same power supply that powers the nearby sensor. To do this required the use of a 5v DC voltage regulator as shown in the circuit below. The only other connections were to the beam break sensor outputs that go to GND of the D1 mini and my chosen IO pin of D1 on the D1 mini.
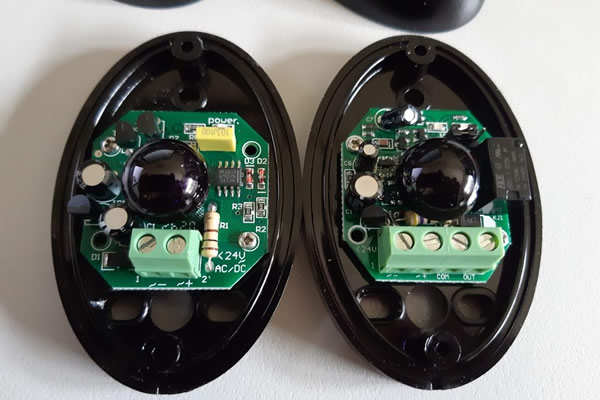
Note that these sensors come in a receiver and transmitter pair with the receiver being identifiable by its 4 screw terminals. The transmitter only needs power so it is identifiable by its 2 screw terminals.
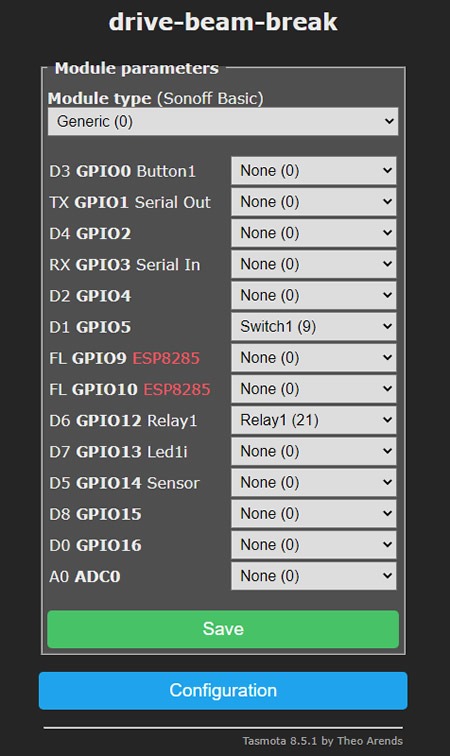
After flashing the D1 mini with Tasmota you configured the device just like you would a PIR sensor. As you can see from my Tasmota config below this is a simple as setting pin D1 as switch1. You may also note that I also set another pin as relay1, this was only to get a visual feedback in the Tasmota interface while I was testing it and is entirely optional. The only other option to not forget to configure in Tasmota is the details of your Home Assistant’s MQTT server.
For the Home Assistant side of the Tasmota config I chose not to set the device as auto discoverable, as doing so will make it show up in Home Assistant as a switch. What I chose to do was add a MQTT binary sensor to my Home Assistant’s configuration.yaml file. An example from my Home Assistants configuration file is below, you will need to adjust the state_topic to whatever you have named yours. In Tasmota’s interface you can confirm this state topic by checking the console section. This will also confirm that the device is connected to your MQTT server too.
binary_sensor:
  - platform: mqtt
    name: "Drive Beam Break"
    state_topic: "stat/drive-beam-break/POWER"
    payload_on: "ON"
    payload_off: "OFF"
    qos: 0
    device_class: motion
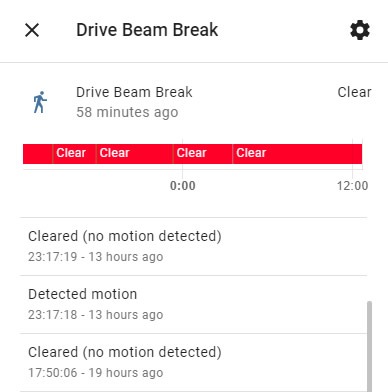
Once your config is saved and checked, you can restart Home Assistant and a new motion sensor will be available to add to the interface or use in Automations.
An example of the sensor in Home Assistant
An example of an automation using my IR beam break sensor.
- id: Rear Light on
  alias: Rear Light on
  trigger:
    - entity_id: binary_sensor.drive_beam_break
      platform: state
      to: "on"
  condition:
    - condition: time
      after: "18:40:00"
      before: "07:00:00"
  action:
    - entity_id: switch.rear_light
      service: switch.turn_on
    - delay: 00:03:30
    - entity_id: switch.rear_light
      service: switch.turn_off
  mode: single
Wrap up
I am very happy with this sensor, it is an amazing bit of gear for the price. The range of the sensor is rated at up to 15 meters. The manual (linked below) states that the range may be reduced by 30% in bad conditions and the distance should not be below 3 meters, I am using it at just over 3.1 meters and have not had any issues. Ideally you should mount this higher than the average cat with an erect tail. While the sensor comes with an o-ring to provide some waterproofing, I also added a bit of silicon to the back around where the screw and cable holes are to protect from water coming in from the rear. An alternative to using Tasmota to connect these to Home Assistant would be ESPHome, I have not tried this with these sensors but I would imagine a ESPHome config something like this would be the place to start with the above hardware.
If you can think of a range of applications for a security sensor like this that involves Home Assistant rather than a traditional security system let us know in the comments below.
Resources
Wemos D1 Mini at BangGood
IR beam break sensor at BangGood
IR beam break sensor user manual
https://www.inspectmygadgets.com/flashing-the-d1-mini-with-tasmota-the-easy-way/
https://tasmota.github.io/docs/PIR-Motion-Sensors/