
If you have played with home automation for some time, you are probably aware of 433MHz devices. They are generally a device like a wall plug relay that is controlled by a small radio remote. While very cheap, their popularity has begun to wane in the past 8 or so years as more and more smart outlets hit the market. While these smart outlets are way better in terms of functionality and reliability, maybe you may have a bunch of 433MHz things lying around that you would prefer to put to a good use if you can do so cheaply. This is where this post comes in.
Background
My experience with 433MHz devices came along when I purchased an automation hub known as Ninja Blocks. Originally a Kickstarter project from 2012, the device was a Beaglebone single board PC with an extra PCB (the Ninja Block) that connected various wired sensors to the web via to their cloud app. Sometime around launch the direction changed to connecting 433MHz devices wirelessly to the block and this proved to be a popular choice at the time. While the stuff was dirt cheap, the system was sometimes flaky. After a lot of promises and a 2nd Kickstarter campaign that saw a lot of people out of pocket, the system eventually stopped working. By the time the system had fallen over, smart sockets like the Wemo were available in Australia, so I naturally moved onto them while automating them with Home Assistant. While I enjoyed the reliability of my new setup, there were still a few 433MHz devices I had that I missed the functionality of. Fortunately, I was able to address this with the cheap Sonoff 433MHz RF Bridge that I have flashed with Espurna to enable it to talk to Home Assistant.
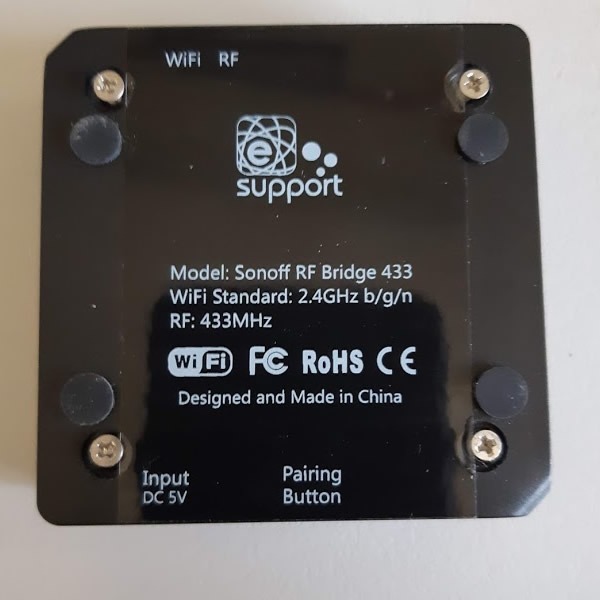
The Sonoff RF Bridge
About half the size of a cigarette packet, the Sonoff RF Bridge is an ESP8266 type Wi-Fi connected device that also embeds a separate processor that can learn and repeat some 433MHz codes. By default, the idea is you download the Sonoff app that communicates with their software on the device, and you can then learn and replay up to four 433MHz RF remotes via the app. The app is OK I guess, but I wanted to get my 433MHz devices taking directly to Home Assistant. Fortunately, the device I purchased was easy to open up and replace the default software with open source software tailored for the ESP8266 controller. I went with a project known as Espurna, but other open source projects also work with the device.
Hacking the RF Bridge
Something that is quite rare for a modern device is that the manufacturer has made it easy to replace the firmware on the device, so much so they even created a blog post on how to do it here. The developer of the firmware I used has also created a post about updating the firmware on the device here. I won’t dwell too much on how I did it, but I will share my pics of my version of the device and a few notes of differences I used in uploading the firmware, please use my note below in reference with the 2 previous links.
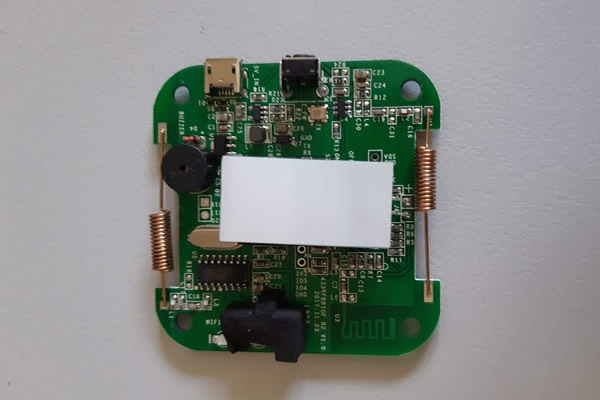
To open the device, peel off the 4 feet to reveal the screws beneath the device.
The PCB will pop out of the device easily. My version of board was R2 V1.0. The goodies we need to get to are under the backlight LED that needs to be carefully lifted up. Note that I have seen several layouts of boards, so your device may vary in layout.
We will need to add a header to the board to plug in a FTDI programmer in order to flash the ESP Chip. Unfortunately you can’t flash the device via the USB port but at least the connections you need to make are in a nice row, although you will need to be handy with a soldering iron.
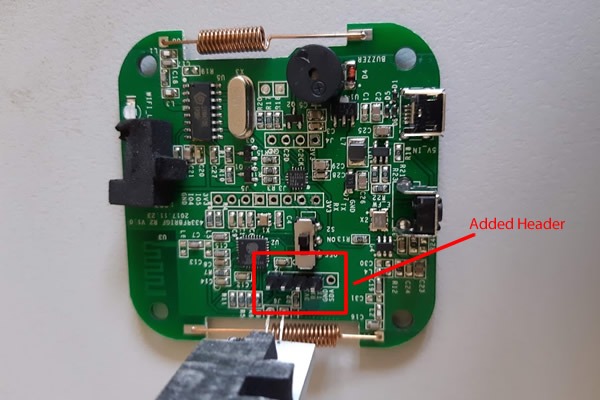
With the header installed you can plug in your FTDI adaptor, RX will go to TX and TX will go to RX while GND will go to GND and VCC will go to VCC, so you can power the device from the adaptor while programming. Note the S2 switch on the PCB, this is for comms to the 433MHz chip and needs to be in the off position while flashing the ESP chip. When you power up the device, you will need to hold the button on the edge of the device to put the ESP chip into flash mode.
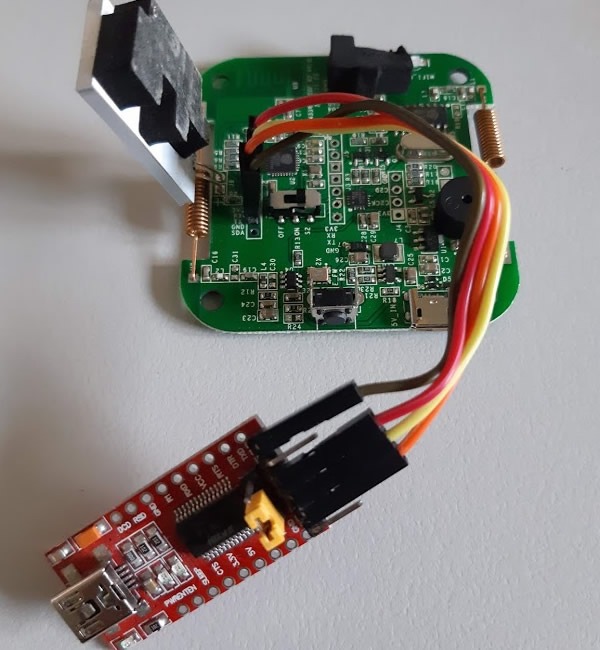
To flash the device first, you will need to download the correct bin file from the espurna site here. The file we are looking for is named espurna-X.XX.X-itead-sonoff-rf.bin (X = the latest release number). Once downloaded, you will need a program on your PC to flash the device. Originally I used the flashesp8266.exe that came bundled with ESP Easy, but I would most likely use the excellent tazmotizer now days. Despite the name, it should be able to flash any bin file to an ESP8266 device with ease. I cover flashing ESP devices more in depth on my previous article here. Once the device is flashed, don’t forget to put the S2 switch back into the on position before reassembly.
Getting the device on your network and into Home Assistant
Once the device is flashed successfully, you will need to connect to the device’s web interface via a phone or tablet. The process is outlined here. Once connected to the web interface, you can input your Wi-Fi details and reboot the device. Once it connects to your Wi-Fi you can continue to setup via your PC, you will just need to figure out the device’s IP address if you let it get its IP from DHCP. Most routers generally have a list of connected devices, so look out for your device now named ESPURNA-XX there.
Once on your devices’ web page, you should see an interface like below. With Espurna, we now have the option of 8 devices. Fortunately, this was plenty for me, so I have never switched to a firmware like Tasmota that may support more devices. To connect the device to Home Assistant, you will need a MQTT broker running and will have to put the details of the broker under the MQTT menu. The details I added were the IP address of my MQTT broker, the MQTT port (which was the default of 1883), my MQTT user and password and a unique MQTT client (I called mine RF-Bridge).
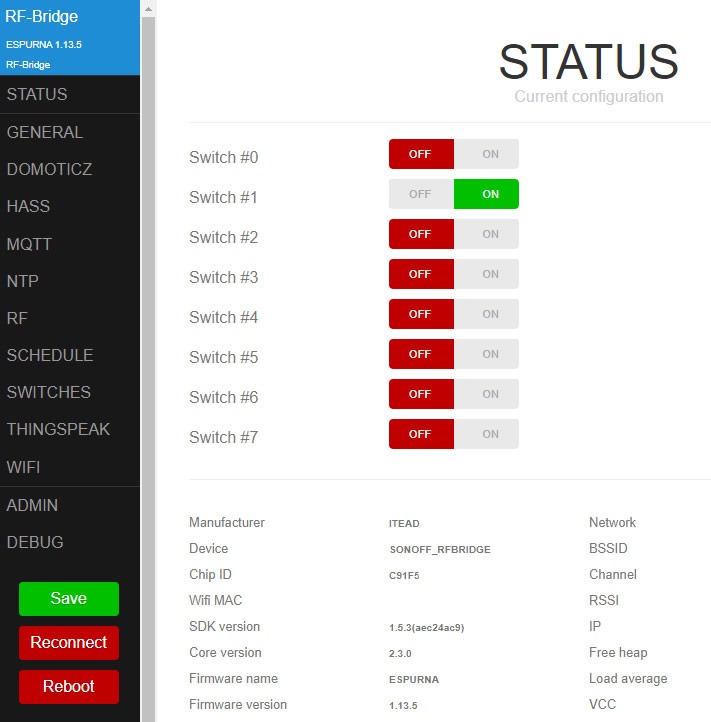
Once your MQTT details are set, under the HASS menu you have the option of setting up the device as auto discovered by Home Assistant. Alternatively, you can manually add the switches to Home Assistant’s configuration.yaml file. A handy YAML guide shows how to do this when you click the show configuration button. Simply cut and past the required switches to under your switch section of your configuration.yaml. Check your config restart Home Assistant and your new switch will be available. This is what I did, so I could control how many switches showed up in my Home Assistant.
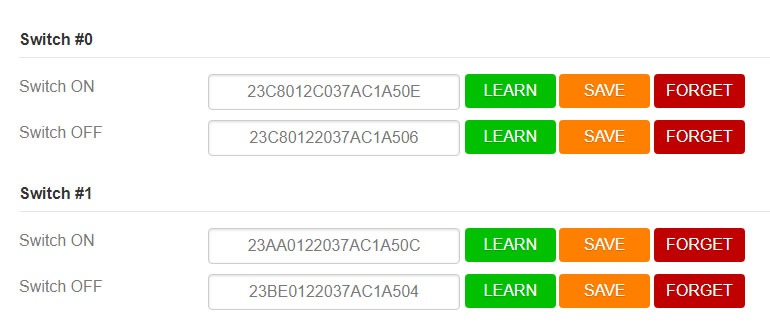
Having the switches in Home Assistant is only good if there is an RF frequency attached to them. Fortunately this is easy to do via the RF menu of Espurna where you will see a fairly self-explanatory menu like below. Just click learn followed by the button on the RF remote you want to learn, then click save to assign that remote button to a switch in Home Assistant.
What devices works?
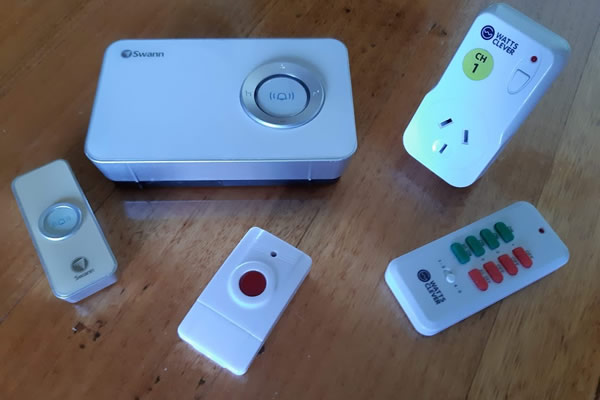
Not all 433MHz devices are going to work with this or any type of bridge, and it is a bit of a hit or miss what will. Below are pics of my devices that did work with the bridge. My purchase decision of these was originally based on a Ninja Blocks wiki page but also note that I could not get the Ninja Blocks temperature sensor working with the bridge. So the stuff listed on that old page may or may not work, and most of it won’t be still available new. If you have a lot of 433MHz stuff, it may be worth the gamble on this bridge, but also be aware some device may not work with it. I also would test your devices first with the default Sonoff app before flashing the device. Also note that some more secure 433MHz devices like car and some garage door remotes use a rolling security code that will never work with this bridge.
My DIY smart doorbell example
My main reason to get 433MHz device into Home Assistant was to capture the bell press from my doorbell. I have created an automation that you see below that will send me a notification on my phone via telegram when the bell is pressed. The automation also shows my camera feed on my Google Nest Hub and plays a ding-dong sound on a Google Home speaker.
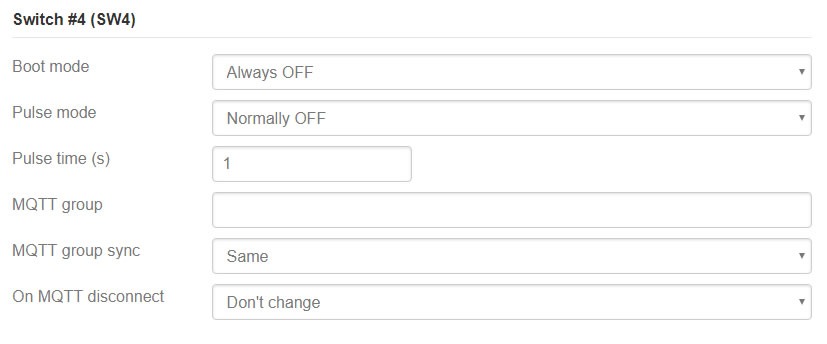
To set up the doorbell press button in Espurna I only programmed the ON button and set it to pulse for 1 second via the switch’s menu in Espurna as shown below.
My doorbell automation YAML
- id: doorbell
  alias: Doorbell
  trigger:
  - payload: '1'
    platform: mqtt
    topic: RF-Bridge/relay/4
  action:
  - service: media_player.play_media
    data:
      entity_id: media_player.hallway_speaker
      media_content_id: https://link.to.your.home.assistant:8123/local/doorbell.mp3
      media_content_type: audio/mp3
  - service: notify.telegram
    data:
      title: Doorbell
      message: There is somebody at the door!
      data:
        photo:
        - url: http://link to your camera image
          caption: There is someone at the Door
 - service: camera.play_stream
    data:
      entity_id: camera.door
      media_player: media_player.kitchen_display
  - delay:
      seconds: 60
  - service: media_player.turn_off
    entity_id: media_player.kitchen_display
Wrap up
Hopefully the above is enough to get you started, if you find 433MHz another device that works with the Sonoff RF bridge, let us know in the comments below.
Resources
Espurna Releases
Tasmotizer (for flashing bin file only)
Sonoff’s RF-bridge hacking page
Espurna Developers RF-Bridge hacking page
Sonoff RF bridge from Banggood
FTDI Programmer from banggood